
1. Getting Started with PinSlip
Welcome to PinSlip! Think of it as a small sticky note pinned to a corner of your desktop: write one whenever inspiration strikes, and it stays right there on your screen.
Every note is a plain Markdown file stored in a folder you choose, and it's fully compatible with Obsidian.
Let's walk through how to open PinSlip for the first time, then write your first note.
1.1 What PinSlip Is
PinSlip is a desktop sticky-note app built around three ideas:
Capture and pin, instantly: No browser, no new document, no "where should I save this?" — just a shortcut, a line of text, and a note pinned to the corner of your screen.
Local-first storage: Every note is an ordinary Markdown file in a folder you choose. PinSlip doesn't lock you into a cloud. If you ever stop using PinSlip, your notes still open in Obsidian, VS Code, Typora, or any other Markdown editor.
Light, but not lightweight: Always-on-top by default, six colors, live Markdown rendering, image paste, note groups, Git sync, AI assistant read/write — focused features, not a stripped-down toy.
How It Differs From Traditional Sticky Notes
Feature | PinSlip | Traditional Desktop Sticky Notes |
|---|---|---|
Markdown support | ✓ | — |
Desktop sticky notes | ✓ | ✓ |
Magnetic note groups | ✓ | ✗ |
Tags and folders | ✓ | — |
Local storage | ✓ | — |
Git sync | ✓ | ✗ |
AI integration | ✓ | ✗ |
Open source | ✓ | — |
✓ Supported | — Not supported | ✗ Not supported (not a simple gap — it's a feature traditional sticky notes never had)
Local Storage: Your Data, Your Call
Default vault directory:
~/Documents/PinSlip(on Windows:C:\Users\<you>\Documents\PinSlip)You can choose a different location on first launch, or override it with the environment variable
PINSLIP_DATA_DIREvery note is a
.mdfile plus images in<vault>/attachments/— copy the directory and you have a complete backup
1.2 Installation
Download the build for your platform from GitHub Releases:
Platform | Installer | How to install |
|---|---|---|
Windows |
| Double-click to install (per-user, no admin required) |
macOS (Apple Silicon) |
| Drag into Applications |
macOS (Intel) |
| Drag into Applications |
Linux (x64) |
| AppImage runs directly; install the deb with |
Platform Tips
macOS: The current build is unsigned → macOS will warn that the app is "damaged" the first time you open it. Work around it with either of these:
In Applications, right-click PinSlip → Open
Or in Terminal:
xattr -cr /Applications/PinSlip.app
Linux AppImage: After downloading, run
chmod +x PinSlip-*.AppImagefirst, then double-click. On GNOME you may not see a tray icon — install theAppIndicatorextension.Linux Wayland: Global shortcuts (Quick Capture) don't respond to native windows. Log in using an X11 session. This is a known limitation.
Auto Update
Each installer build silently checks for a new release 15 seconds after launch. When an update is found, a prompt appears.
When the download finishes, a "restart and install" prompt lets you finish in one click.
1.3 First Launch
Choose Your Notes Directory
The first time you open PinSlip, you'll be prompted to choose where to keep your notes. Click the selector to open a directory picker and choose an empty or existing folder:
Default selection:
~/Documents/PinSlip. You can pick any folder you like, as long as you have read/write permission.Once chosen, your notes will be stored under the
notesdirectory inside it.You can also point at your existing Obsidian vault (for example
~/Documents/ObsidianVault) or have Obsidian use the PinSlip directory as its vault — they share notes seamlessly.
1.4 Interface Tour
Main Window
The main window docks at the bottom-right of your screen by default:
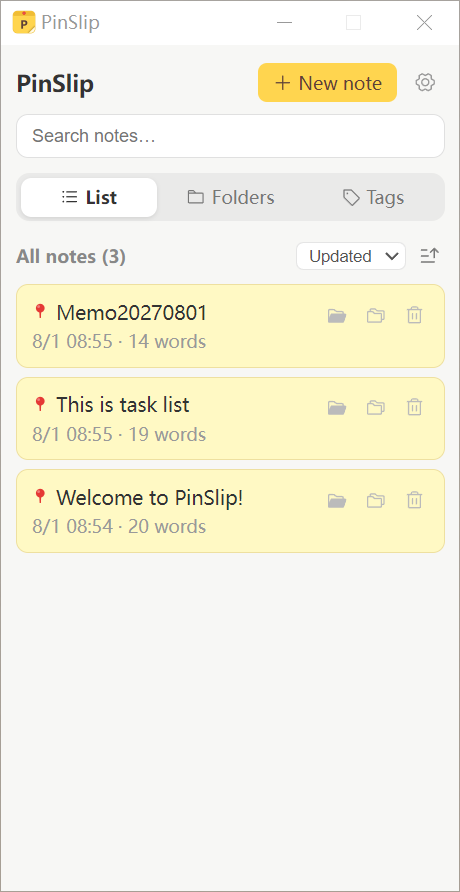
Top: Search box. Type to search — no Enter required.
Middle: Three note views for different browsing scenarios. Switch between them:
List: All notes sorted by update time, descending. You can adjust the sort to use update time or creation time.
Folder: Directory tree browsing + breadcrumb navigation. Shows subfolders and notes inside the current directory.
Tags: Notes grouped by tag, collapsible.
Top-right: New tag button (at the root) and ⚙ Settings button (opens the settings drawer).
System Tray
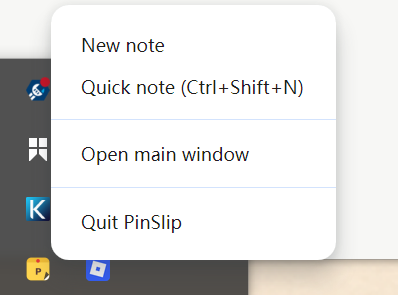
Left-click: Show / hide the main window.
Right-click: Menu (New Note / Quick Capture / Open Main Window / Quit).
Note Window
Any time, hit the shortcut Ctrl+Shift+N (auto-mapped to Cmd+Shift+N on macOS) to bring up Quick Capture — write something, and it'll appear in the main list.
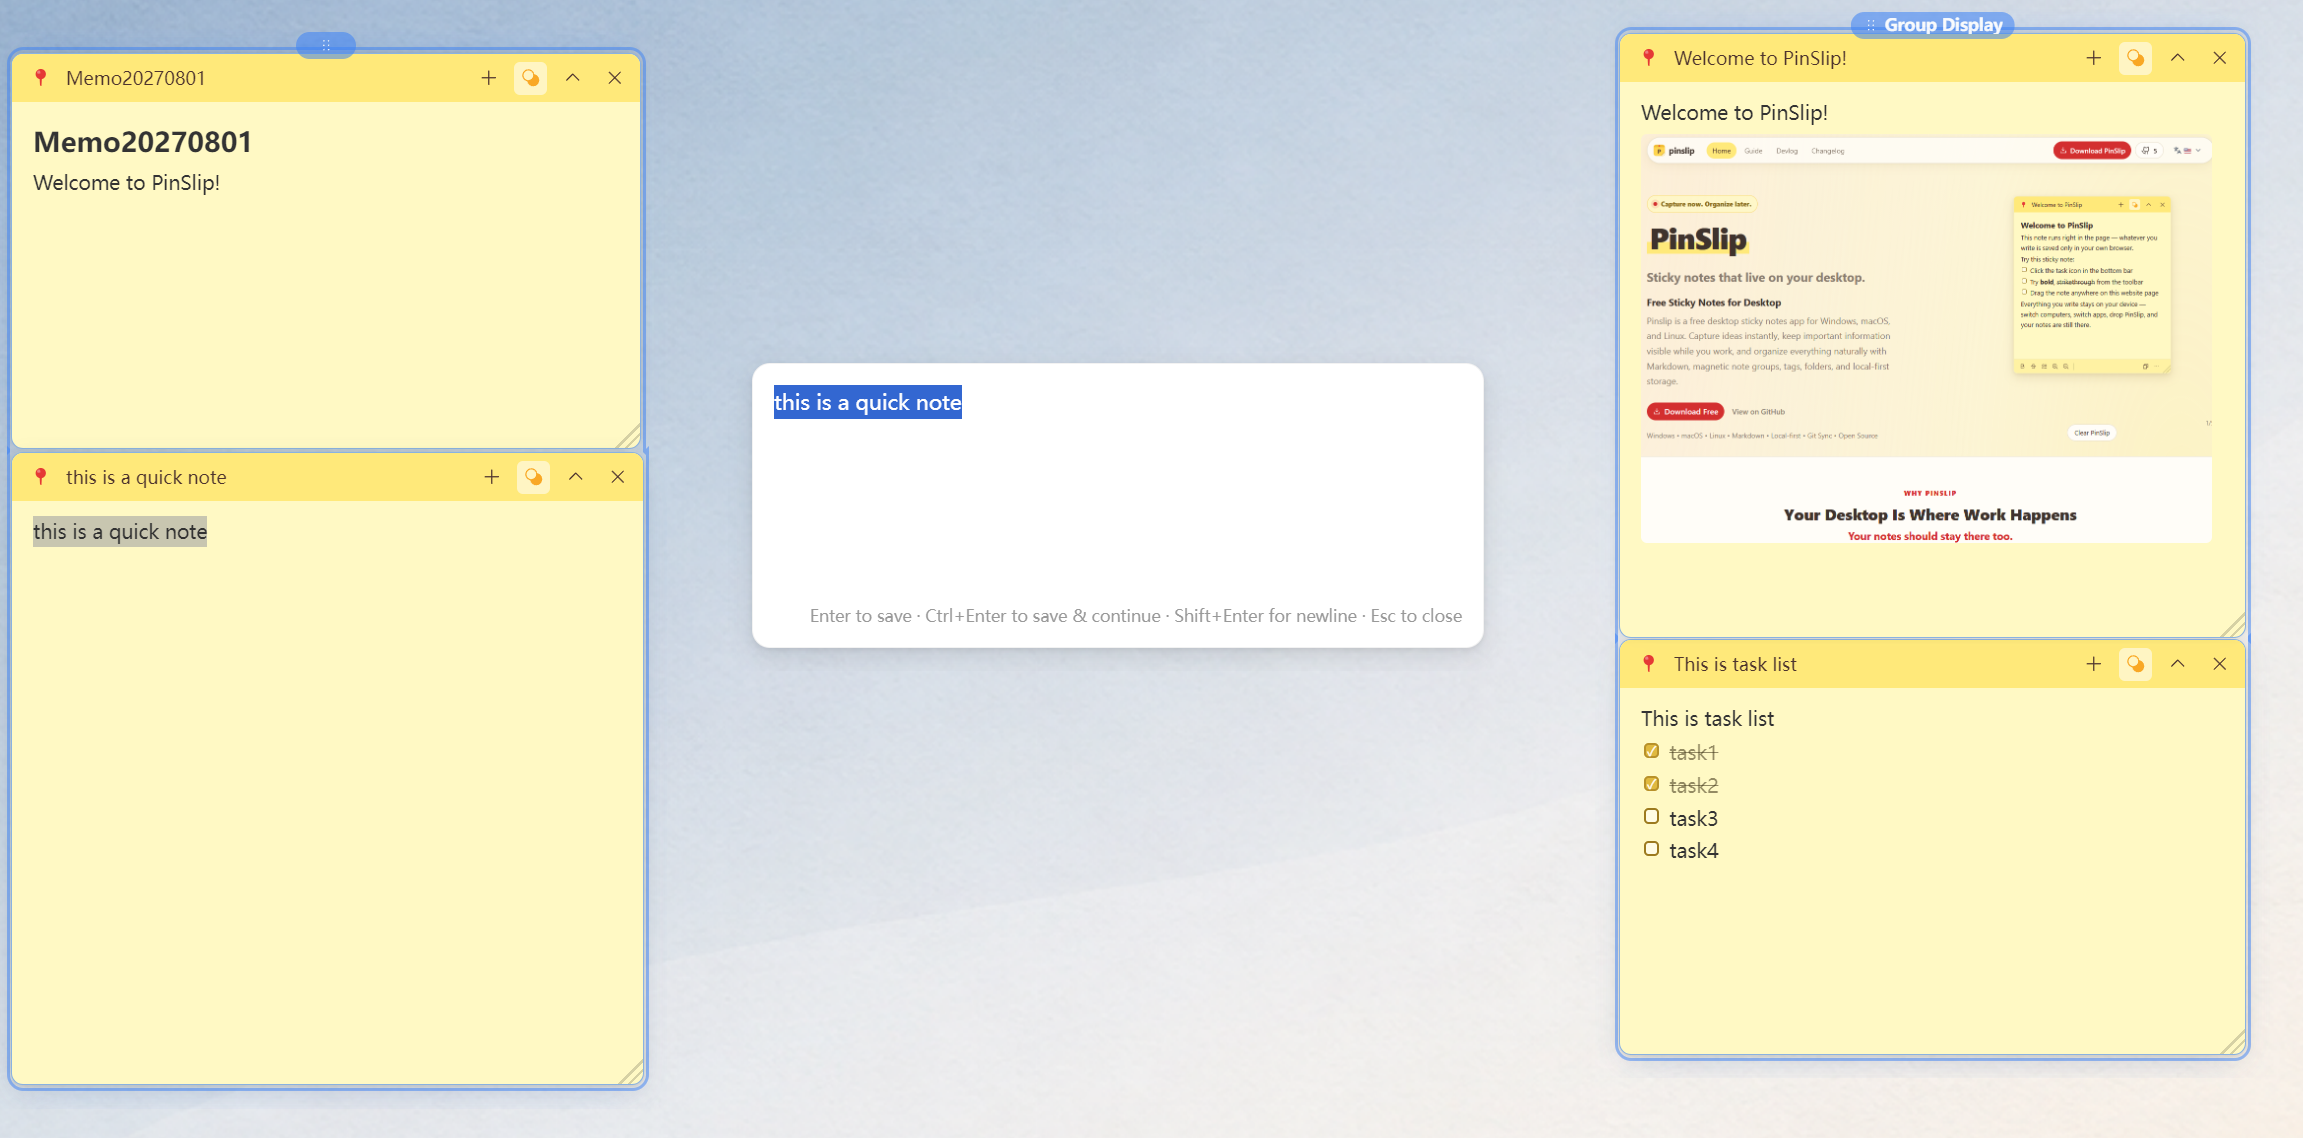
Give it a try! Write your first PinSlip note.